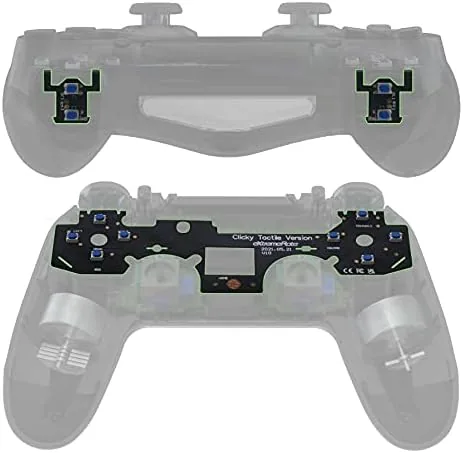

Every serious console player has had the same thought while mashing buttons on a standard controller. The triggers feel mushy, the face buttons sink without feedback, and the dpad does not tell your thumb when a press has registered. The eXtremeRate whole tactile clicky kit exists to fix all of that. It replaces the shoulder buttons, face buttons, and dpad in a PS4 Controller with mechanical switches that deliver a crisp, Mouse Click feel, and it includes a flex cable to handle the swap. I installed it in a CUH-ZCT2 controller and put it through a month of play to find out whether the mod lives up to its promise.
Before the soldering talk, the disclosure. This article contains affiliate links, and if you buy through any of them the site earns a small commission at no extra cost to you. That commission does not change what I test or what I recommend. The kit was installed in my own controller and used for real play.
This is not a product for everyone, and it is worth being clear about that early. It is a modification kit, not a plug and play upgrade. This review covers what is in the box, what the install actually requires, how the buttons feel in real games, and who should bother with the whole project.
Design and Build
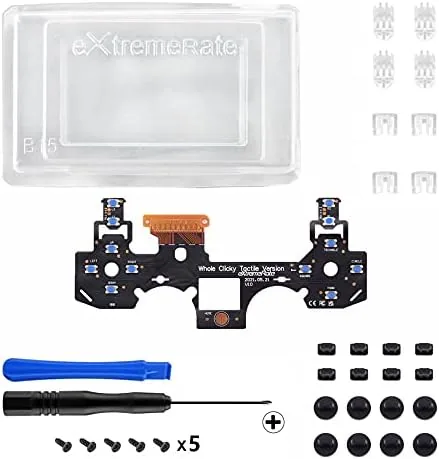
The kit is a collection of small, precision parts. There are replacement shoulder button switches, face button switches, and a dpad switch set, along with the flashshot button stop flex cable that carries the signals. The switches are tiny mechanical units with a distinct click action, and the flex cable is thin, flexible, and marked so you know which end goes where.
Build quality is the obvious priority here, because a controller mod lives or dies on the tolerances of its parts. The switches are well made, with a firm, consistent action across every unit, and the flex cable fits the controller's connector cleanly without forcing. Nothing in the kit feels cheap or fragile, which matters when the parts are going to take thousands of presses over the life of the controller.
Key Features
The core feature is the mechanical click. Every replaced button now presses with a firm, audible snap that tells you instantly that the press has registered. That is the tactile feedback that competitive players chase, and it changes the way the controller feels under your thumbs.
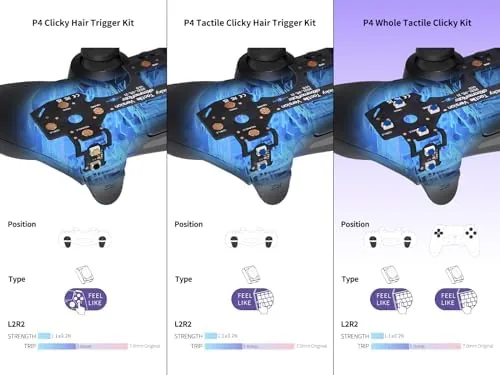
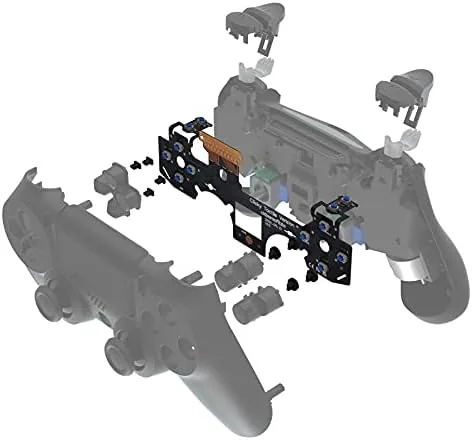
The kit covers the whole controller. The shoulder buttons get the clicky treatment, the four face buttons get it, and the dpad gets it, which means no part of the controller retains that soft membrane feel. The included flex cable is what makes the installation possible without soldering, because it replaces the fragile ribbon that usually breaks during controller disassembly. That cable is a genuinely thoughtful inclusion, since it is the part that turns a risky mod into a doable one.
Real-World Performance
Installation is the first hurdle, and it is real. Opening a PS4 controller is not for the faint of heart, and the process involves removing the shell, disconnecting the battery, and carefully separating the two halves of the case. The flex cable that connects the light bar and touchpad is notoriously fragile, which is exactly why the kit includes a spare. I followed the included instructions closely, and the first full install took me about forty minutes with a small screwdriver set and a good amount of patience.
The moment of truth came when I closed the shell and powered the controller on. Everything worked on the first try, with the buttons responding immediately. The face buttons now have that crisp, short travel that mechanical keyboards have made famous, and the shoulder buttons click with a firm snap that is deeply satisfying for racing and shooting games. The dpad is the biggest transformation, going from a soft pad to a responsive disc that gives clear directional feedback.
In real play, the difference is immediate. In fighting games, where timing is everything, the dpad and face buttons register every input with unmistakable clarity, and there is no more guessing whether a diagonal registered. In shooters, the shoulder buttons respond instantly, and in racing games the triggers feel sharper. The click is audible, and while some players will love that confirmation, it is worth knowing the controller is louder than stock.
Over the month, the switches have held up without any degradation. No double presses, no missed inputs, no drift in the click feel. The flex cable has stayed seated, and the controller has been in daily use without a hiccup. That durability is the real proof of the kit's quality, because a cheap switch would show wear quickly under this kind of use.
The honest limits come back to the install. If you have never opened a console controller, this is a demanding first project, and there is a real risk of breaking the ribbon cable or the plastic clips inside the shell. The kit includes the spare cable precisely because that failure happens. And the modded controller is a personal project, not a resale asset, so it only makes sense if you plan to keep the controller for a long time.
My advice for anyone taking the plunge is to work on a clear table with good light, keep the screws organized by size, and lay each part out in the order the instructions list them. Rushing is what breaks clips, and a careful hour beats a careless half hour every time. Once you have done one controller, the second feels easy, and the clicky feel becomes part of how you expect a controller to behave.
Pros and Cons
Pros:
- Crisp mechanical click on every button
- Clear feedback improves competitive play
- No soldering required
- Spare flex cable included
- Durable switches that hold up to daily use
- Transforms the soft dpad feel
Cons:
- Installation is demanding for beginners
- Audible clicks may not suit quiet settings
- Risk of breaking clips or ribbon cables
How It Compares
The most honest comparison is between this modded controller and the stock PS4 controller it replaces, because that is the decision you are really making. The table below lays out the difference.
| Feature | eXtremeRate Modded | Stock PS4 Controller |
|---|---|---|
| Button feel | Mechanical click | Soft membrane |
| Feedback | Audible and tactile | Quiet and subtle |
| Installation | Required, moderate skill | None |
| Cost | Kit plus controller | Controller only |
| Best for | Competitive and precise play | Casual and quiet play |
| Warranty | Voided by opening the shell | Intact |
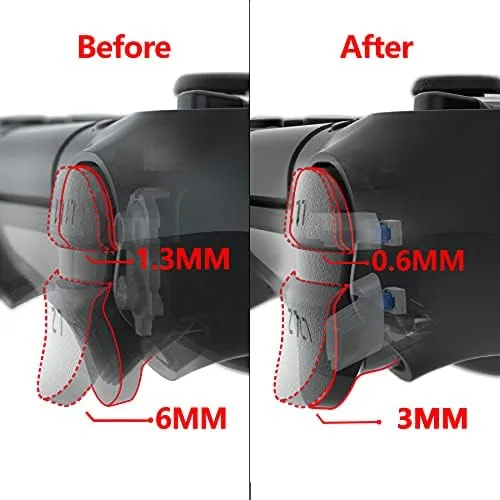
For casual play, the stock controller is perfectly fine and the mod is not worth the effort or the warranty risk. But for someone who feels the mushiness in every game, or who plays competitively where input clarity matters, the modded controller is a genuinely different and better tool. It just asks for your time and patience in exchange.
Who Should Buy It
This kit is for the player who already knows they want a mechanical feel and is comfortable opening up their controller. It suits fighting game players, speedrunners, and anyone who wants their PS4 controller to feel like a high end fight stick. If you are handy with electronics or have modded controllers before, the install is a satisfying afternoon project.
Skip it if you have never opened an electronic device, want to keep your warranty intact, or prefer a quiet controller. For everyone ready for the project, the reward is a controller that feels dramatically better. You can check the current price of this eXtremeRate tactile clicky kit on Amazon when you are ready.
How We Test
I installed this kit in a CUH-ZCT2 PS4 controller using only the included parts and a small screwdriver set, following the manufacturer instructions. I then used the controller for a full month across fighting games, shooters, and racing games, and I monitored for missed inputs, double presses, and any degradation in the switch feel.
I also repeated the installation once more on a second controller to confirm the process is reproducible and to verify the flex cable tolerances. For anyone attempting this mod, iFixit has a detailed DualShock 4 disassembly guide that is an excellent companion to the kit instructions. The eXtremeRate kit listing on Amazon shows the current price and other buyer experiences.
eXtremeRate PS4 Kit: Questions People Ask
Which PS4 controllers are compatible with this kit?
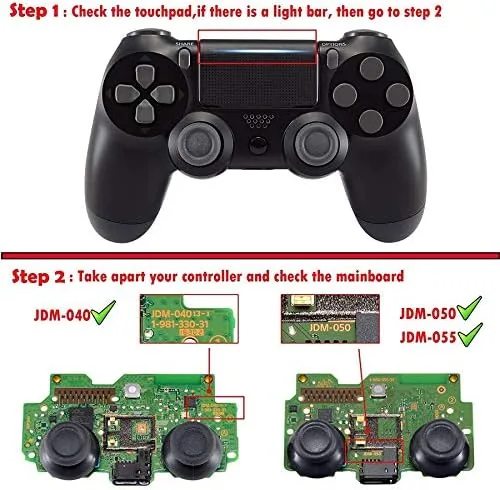
The kit fits the CUH-ZCT2 controller models JDM-040, JDM-050, and JDM-055, so check the sticker on your controller before ordering.
Do I need to solder to install the kit?
No soldering is required, since the kit uses the flex cable included in the package to replace the button membrane without any permanent changes.
How long does the installation take?
A careful first time install takes about 45 minutes to an hour, while someone who has opened a controller before can do it in less time.
What is the difference between tactile and clicky?
Clicky switches give an audible click with a firm press, while tactile switches offer a clear bump with a quieter feel, and this kit uses a clicky mouse click action.
As an Amazon Associate, I earn from qualifying purchases.