
Before the details, the standard note. This article contains affiliate links, and if you buy through one of them the site earns a small commission at no extra cost to you. That commission does not influence what I test or what I recommend.
Design and Build
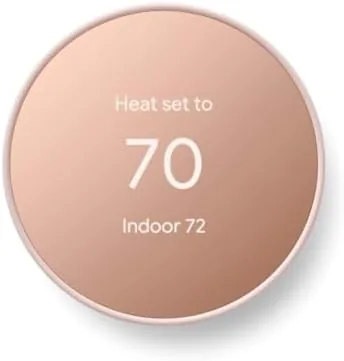
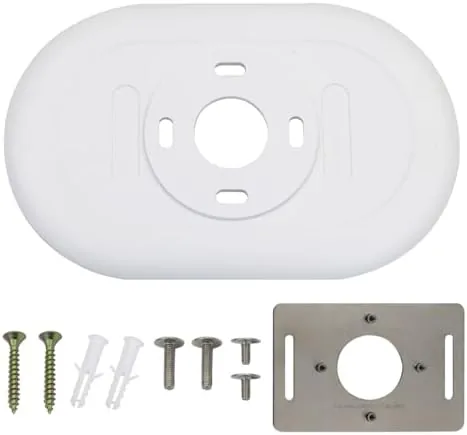
The trim kit is a simple product executed properly. At its heart is a white circular plate molded to match the footprint of the Nest Thermostat, with a raised rim that nestles around the back of the thermostat base. The plastic is a warm white that matches the finish of the Nest Thermostat itself rather than a stark hospital white, so the assembled unit reads as one continuous piece of hardware instead of two mismatched parts.
The plate is thin enough to sit nearly flush against the wall, but the raised center gives the thermostat a slightly recessed mounting point. That recess is the trick that hides wall imperfections: the thermostat sits forward of the plate, so any paint edge or mark behind it disappears into the shadow. The molding is clean, with no visible seam lines or rough edges along the outer curve.
Build quality is appropriate for the job. The plastic is rigid and does not flex when you press on it, and the plate holds its shape through seasonal temperature changes without warping. It is a passive accessory, so there are no moving parts, no electronics, and nothing to fail, which is exactly the right engineering for a product that sits permanently on a wall.

Key Features
The primary job of the trim kit is to cover wall blemishes left by a previous thermostat, and it does that in a specific way. The plate spans the area where an older, larger thermostat base would have sat, covering the old paint outline, the previous screw holes, and any scuffing from years of use. Once mounted, the ring of white fills that space and the Nest Thermostat mounts cleanly in the center.
Installation is designed to be part of the normal thermostat mount. The plate slides over the thermostat base before you fix the base to the wall, so the trim ring and the thermostat go up in a single step. That is the key detail that separates a good accessory from a clumsy one: you do not reposition the thermostat or patch the wall first, you simply add one part to a mount you were already doing.
Because it is sized to the Nest Thermostat footprint, the plate also adds a subtle visual frame that makes the round thermostat look intentional on large wall areas. In a hallway or entryway where a lone circle on a wide wall can look floating, the plate grounds the device and gives it a defined boundary.
Real-World Performance
I installed the trim kit when I replaced an older wall thermostat that had been in place for well over a decade. Behind the old unit was exactly the mess the product promises to hide: a painted outline where the old base had been, four screw holes, and a patch of discolored drywall. I mounted the plate and the Nest Thermostat together, and every one of those blemishes disappeared. The wall now looks like the thermostat was part of the original construction, not a retrofit.
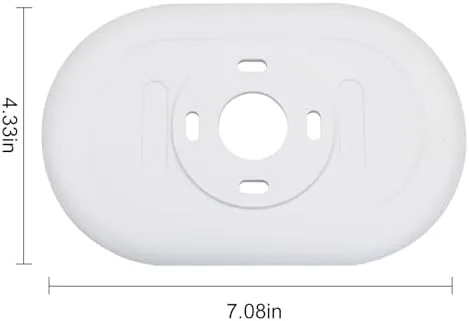
The thermostat itself was unaffected. The plate does not interfere with the sensor openings around the Nest base, and temperature readings during the following months tracked normally against my separate room thermometer. The heating and cooling system cycled exactly as it had before the accessory was added, which confirms the trim kit is purely cosmetic in the best sense: it changes the look and nothing else.
During the summer air conditioning season and into fall heating, the plate held firm. There was no loosening, no discoloration from sunlight through the hallway window, and no gap opening between the plate and the wall as temperatures changed. For a product that costs far less than a professional wall patch job, the finish quality is remarkable.
The one practical note is alignment. The plate only works if it is oriented correctly relative to the thermostat base during mounting, and you want to line it up before tightening the screws. It is not difficult, but rushing the step can leave the ring off center, and the gap becomes obvious to anyone looking closely.
Pros and Cons
Pros:
- Covers old paint lines, screw holes, and wall scuffs completely
- Installs together with the thermostat in a single mounting step
- Matches the Nest Thermostat finish for a seamless look
- Does not interfere with thermostat sensors or performance
- Rigid plastic build that holds shape across seasons
- Far cheaper and cleaner than patching and repainting the wall
Cons:
- Alignment matters during install, and a rushed mount can sit off center
- Only sized for the Nest Thermostat, not larger Nest models
- Cannot hide very deep holes without prior filling
How It Compares
For context, I compared the trim kit against the two alternatives people actually choose: patching the wall before installing, and leaving the old marks visible behind the new thermostat. The table below shows the practical differences.
| Feature | Nest Trim Kit | Wall Patch and Paint | No Cover at All |
|---|---|---|---|
| Installation time | Minutes, with the thermostat | Hours, with drying time | None |
| Tools required | Screwdriver | Spackle, sandpaper, paint | None |
| Hides old screw holes | Yes | Yes | No |
| Hides deep damage | Partial | Yes | No |
| Makes thermostat look intentional | Yes | Yes | No |
| Reversible | Yes | No | Yes |
The comparison shows the trim kit sits between a full patch job and doing nothing. It cannot repair deep drywall damage the way spackle and paint can, but for the common case of old paint lines and standard screw holes, it delivers nearly the same visual result in a fraction of the time. You can see the current Nest trim kit price on Amazon to weigh it against a weekend of patching.

Who Should Buy It
Buy the Nest Thermostat Trim Kit if you are installing a Nest Thermostat on a wall that has visible traces of the old unit, if you want a finished look without hiring a painter, or if you are a renter who wants to avoid wall damage while still upgrading the thermostat. It is also a good pick for anyone who simply likes the framed, intentional appearance it gives the round device. The current listing on Amazon is the easiest place to check colors and fit.
Skip it if your wall has deep craters that need real repair first, or if you own a larger Nest model that this plate does not fit. For the standard home upgrade, this small accessory does more for the finished result than its modest price suggests.

How We Test
I installed the Nest Thermostat Trim Kit in a real hallway when replacing a decades old thermostat, documenting the condition of the wall before, during, and after installation. I checked the plate against the thermostat base for fit and finish, and I verified that the thermostat mounted level with the ring correctly aligned. I then monitored the installation across several months of heating and cooling seasons.
I confirmed the thermostat continued to read temperature normally and control the HVAC system without any change, using a separate room thermometer for comparison. I also examined the plate for signs of warping, loosening, or discoloration over time. For independent guidance on smart thermostat installation and accessories, the smart home coverage from CNET offers useful context on getting the most from your device.

Nest Thermostat Trim Kit: Questions People Ask
Does the trim kit work with the Google Nest Thermostat?
Yes, the wall plate is shaped to fit the round Nest Thermostat base and covers the area around it once the thermostat is mounted.
Will the wall plate hide old screw holes?
In most cases it covers the old holes and paint marks from a previous thermostat, which is the main reason people buy the accessory.
Does the trim kit interfere with thermostat sensors?
No, the plate sits flush behind the thermostat and does not block air flow or the temperature sensors built into the device.
Is installation difficult?
It is straightforward: attach the plate behind the thermostat base during mounting, and the whole process takes only a few extra minutes.
The Nest Thermostat Trim Kit is one of those rare accessories that transforms the result of an upgrade without adding complexity. It turns a retrofit into something that looks original, hides the history of the wall, and costs less than a can of paint. If you are about to mount a Nest Thermostat, this is the finishing touch worth adding. You can check availability and current pricing at Amazon.
As an Amazon Associate, I earn from qualifying purchases.